


Led UP&DOWN Light öffnen
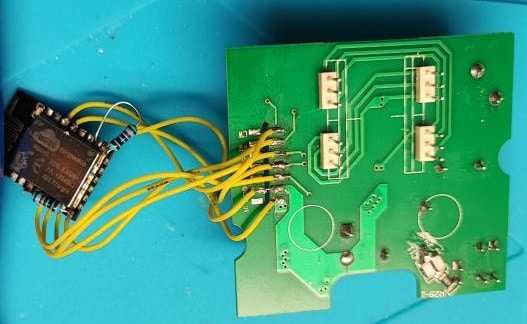
Den oberen Deckel abnehmen und dann sollte die Platine sichtbar sein.
Die Platine ist gesteckt und muss nach obenhin abgezogen werden.

Schaltbild FTDI Adapter


Habt ihr nun den ESP Flashbereit – könnt ihr nun wahlweise ESPHome oder Tasmota Flashen.
esphome:
  name: wandleuchtev2
  platform: ESP8266
  board: esp01_1m


wifi:
  networks:
    - ssid: "FritzBox"
      password: "123456789"
  power_save_mode: none
  output_power: 20dB
  manual_ip:
   static_ip: 192.168.178.XX
   gateway: 192.168.178.1
   subnet: 255.255.255.0

  ap:
    ssid: "wandleuchtev2"
    password: "PW"

captive_portal:

# Enable logging
logger:

# Enable Home Assistant API
api:

ota:

sensor:
  - platform: wifi_signal
    name: "wandleuchtev2 WiFi Signal"
    update_interval: 60s


light:
  - platform: rgbww
    name: wandleuchtev2
    id: wandleuchtev2
    gamma_correct: 2.8
    red: red
    green: green
    blue: blue
    cold_white: cold_white
    warm_white: warm_white
    cold_white_color_temperature: 6200 K
    warm_white_color_temperature: 2800 K
    color_interlock: true
    effects:
     - strobe:
         name: Strobe Effect
         colors:
            - state: True
              brightness: 80%
              red: 80%
              green: 0%
              blue: 80%
              duration: 500ms
            - state: False
              duration: 250ms
            - state: True
              brightness: 80%
              red: 0%
              green: 80%
              blue: 0%
              duration: 500ms
     - flicker:
          name: Flicker Effect
          alpha: 95%
          intensity: 2.0%
     - random:
          name: Slow Random Effect
          transition_length: 12s
          update_interval: 10s
     - random:
          name: Fast Random Effect
          transition_length: 4s
          update_interval: 5s

output:
  - platform: esp8266_pwm
    id: red
    pin: GPIO4
  - platform: esp8266_pwm
    id: green
    pin: GPIO12
  - platform: esp8266_pwm
    id: blue
    pin: GPIO14
  - platform: esp8266_pwm
    id: cold_white
    pin: GPIO5
    max_power: 0.85
  - platform: esp8266_pwm
    id: warm_white
    pin: GPIO13
    max_power: 0.85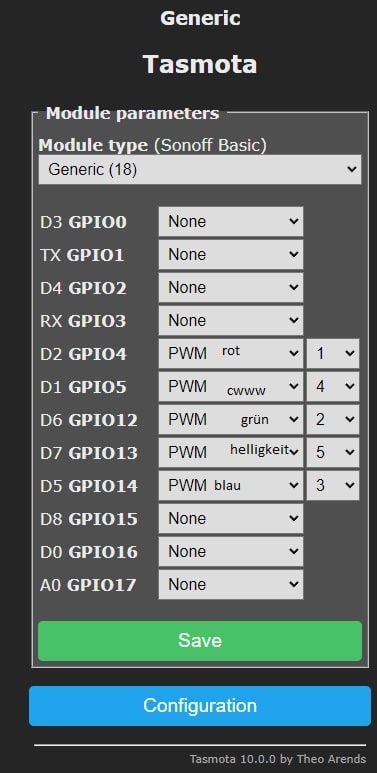
Nun die GPIO Zuordnung
| ESP8266-12f | Platine |
| GPIO4 | R (Rot) |
| GPIO5 | CW (Kalt-Weiß) |
| GPIO12 | G (Grün) |
| GPIO13 | WW (Warm-Weiß) |
| GPIO14 | B (Blau) |
| GND | GND (Ground) |
| 3v3 | 3v3 |
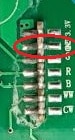
WICHTIG: Es müssen dauerhaft Zwei 10K Widerstande zwischen VCC –> EN und GPIO15 –> GND anliegen. Das sorgt dafür das der Chip auch bootet. Dies gilt aber nur bei dem ESP8266-f12 Chip. Siehe das Bild weiter oben.
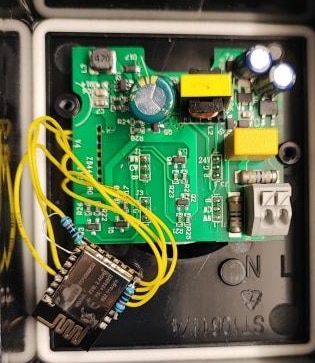
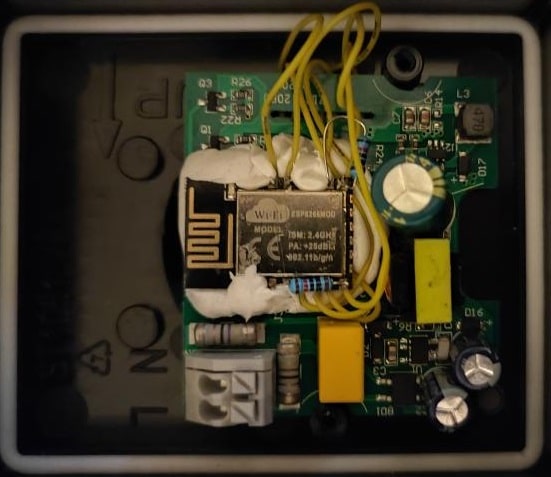
Knete zur „Befestigung“ des ESP
