
innr Zigbee GU10 Lampe, Color, kompatibel mit Philips Hue, Alexa, Hey Google, SmartThings (Bridge erforderlich) GU10 Smart LED, dimmbar, RGB, 16 Millionen Farben, 2-Pack, RS 230 C-2
--
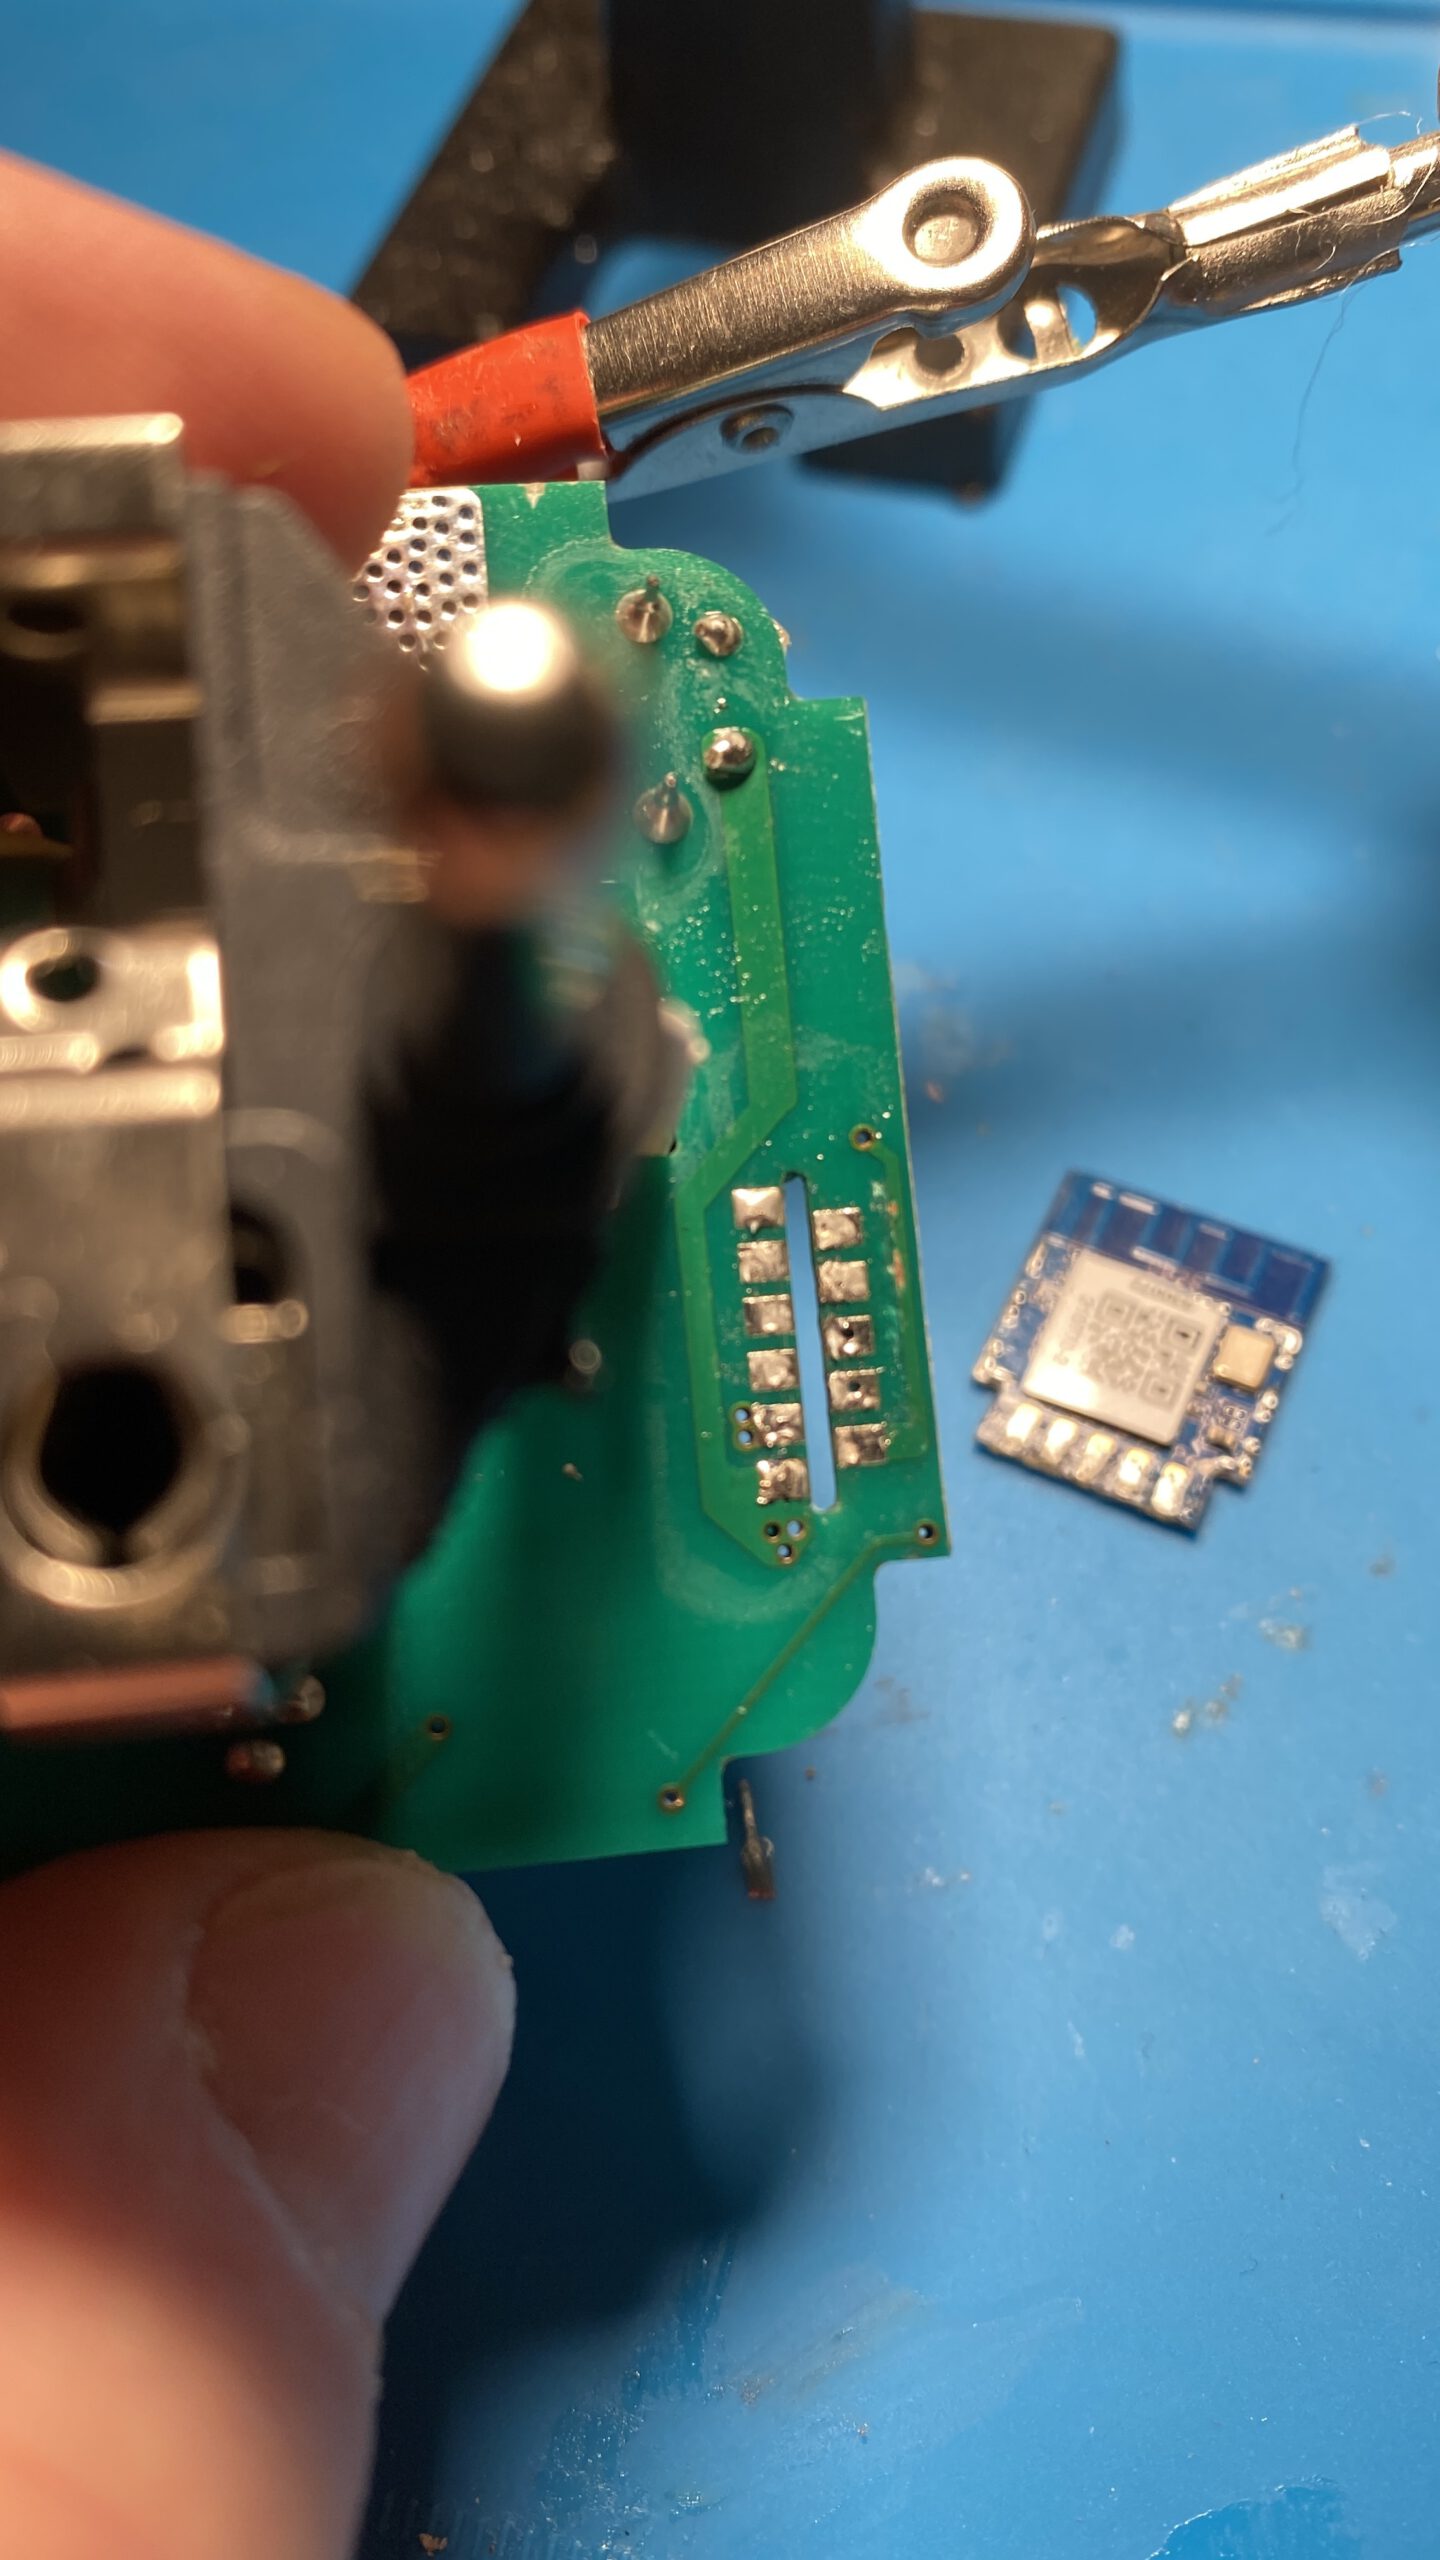
Leider ist der verbaute Chip nicht in der Lage geflasht zu werden und muss getauscht werden.
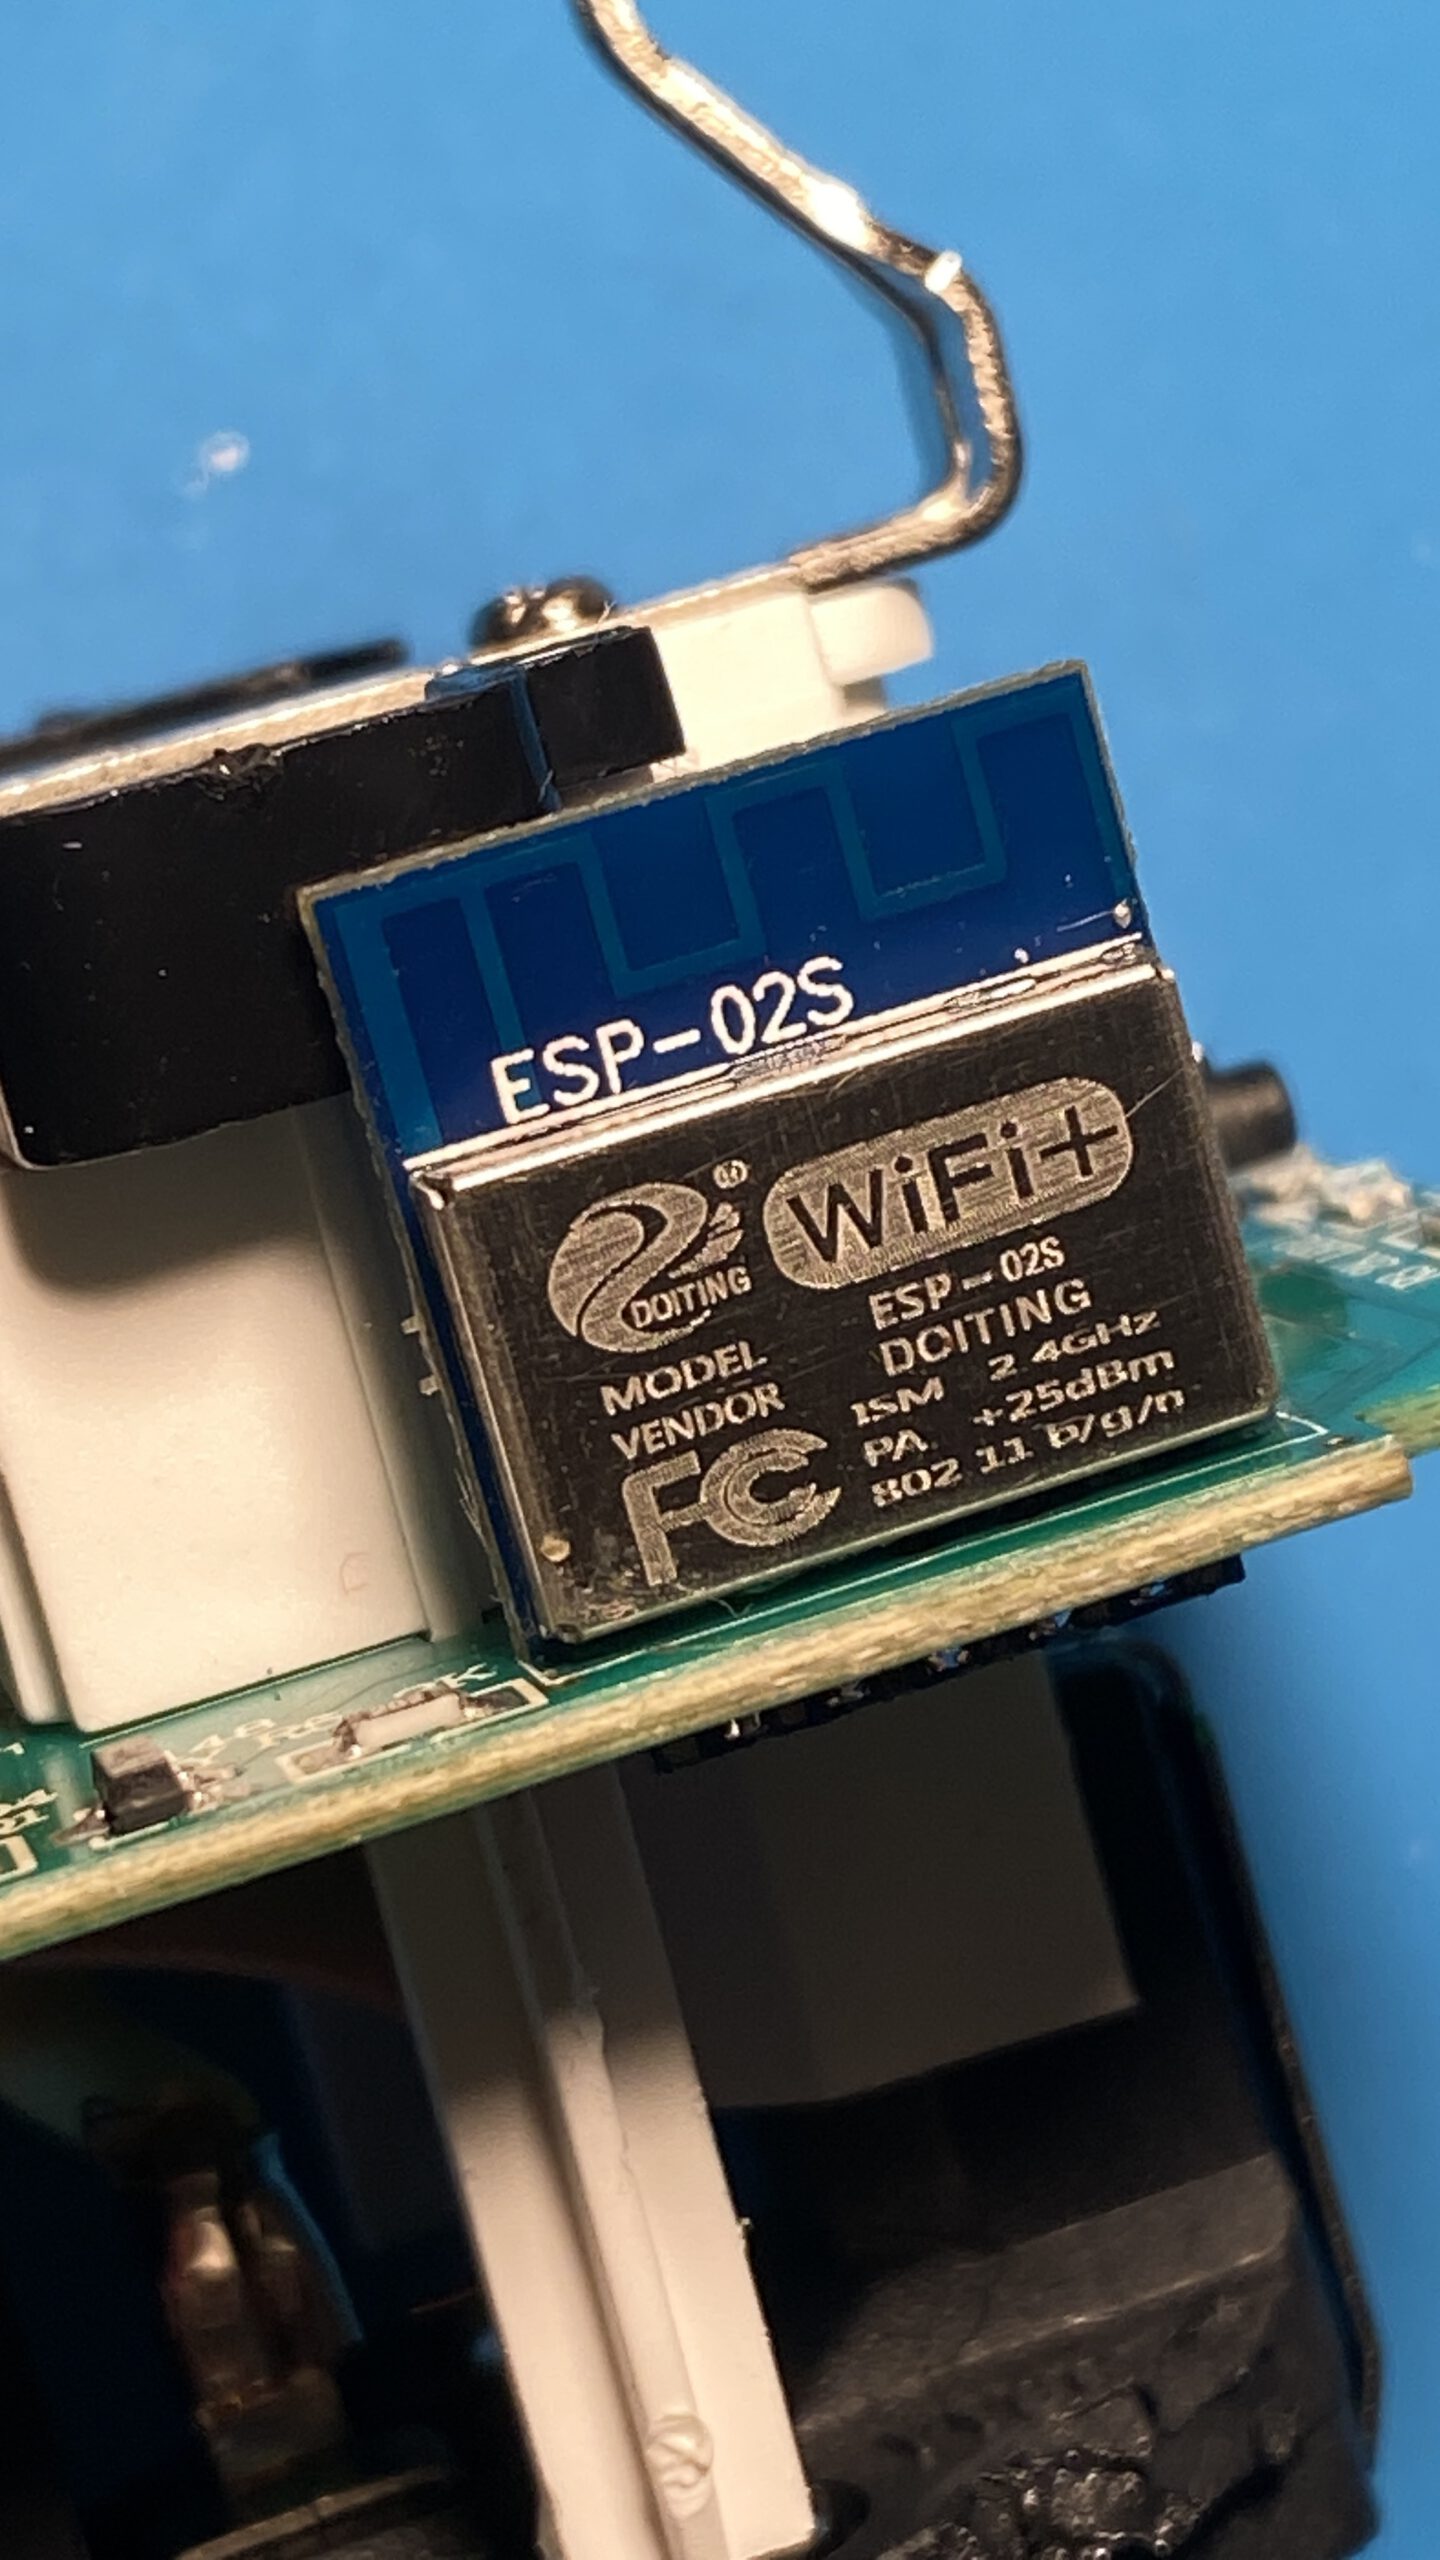
Als erstes lötet ihr den vorhanden Chip aus und lötet euch 5 Adern an den Chip ESP-02S
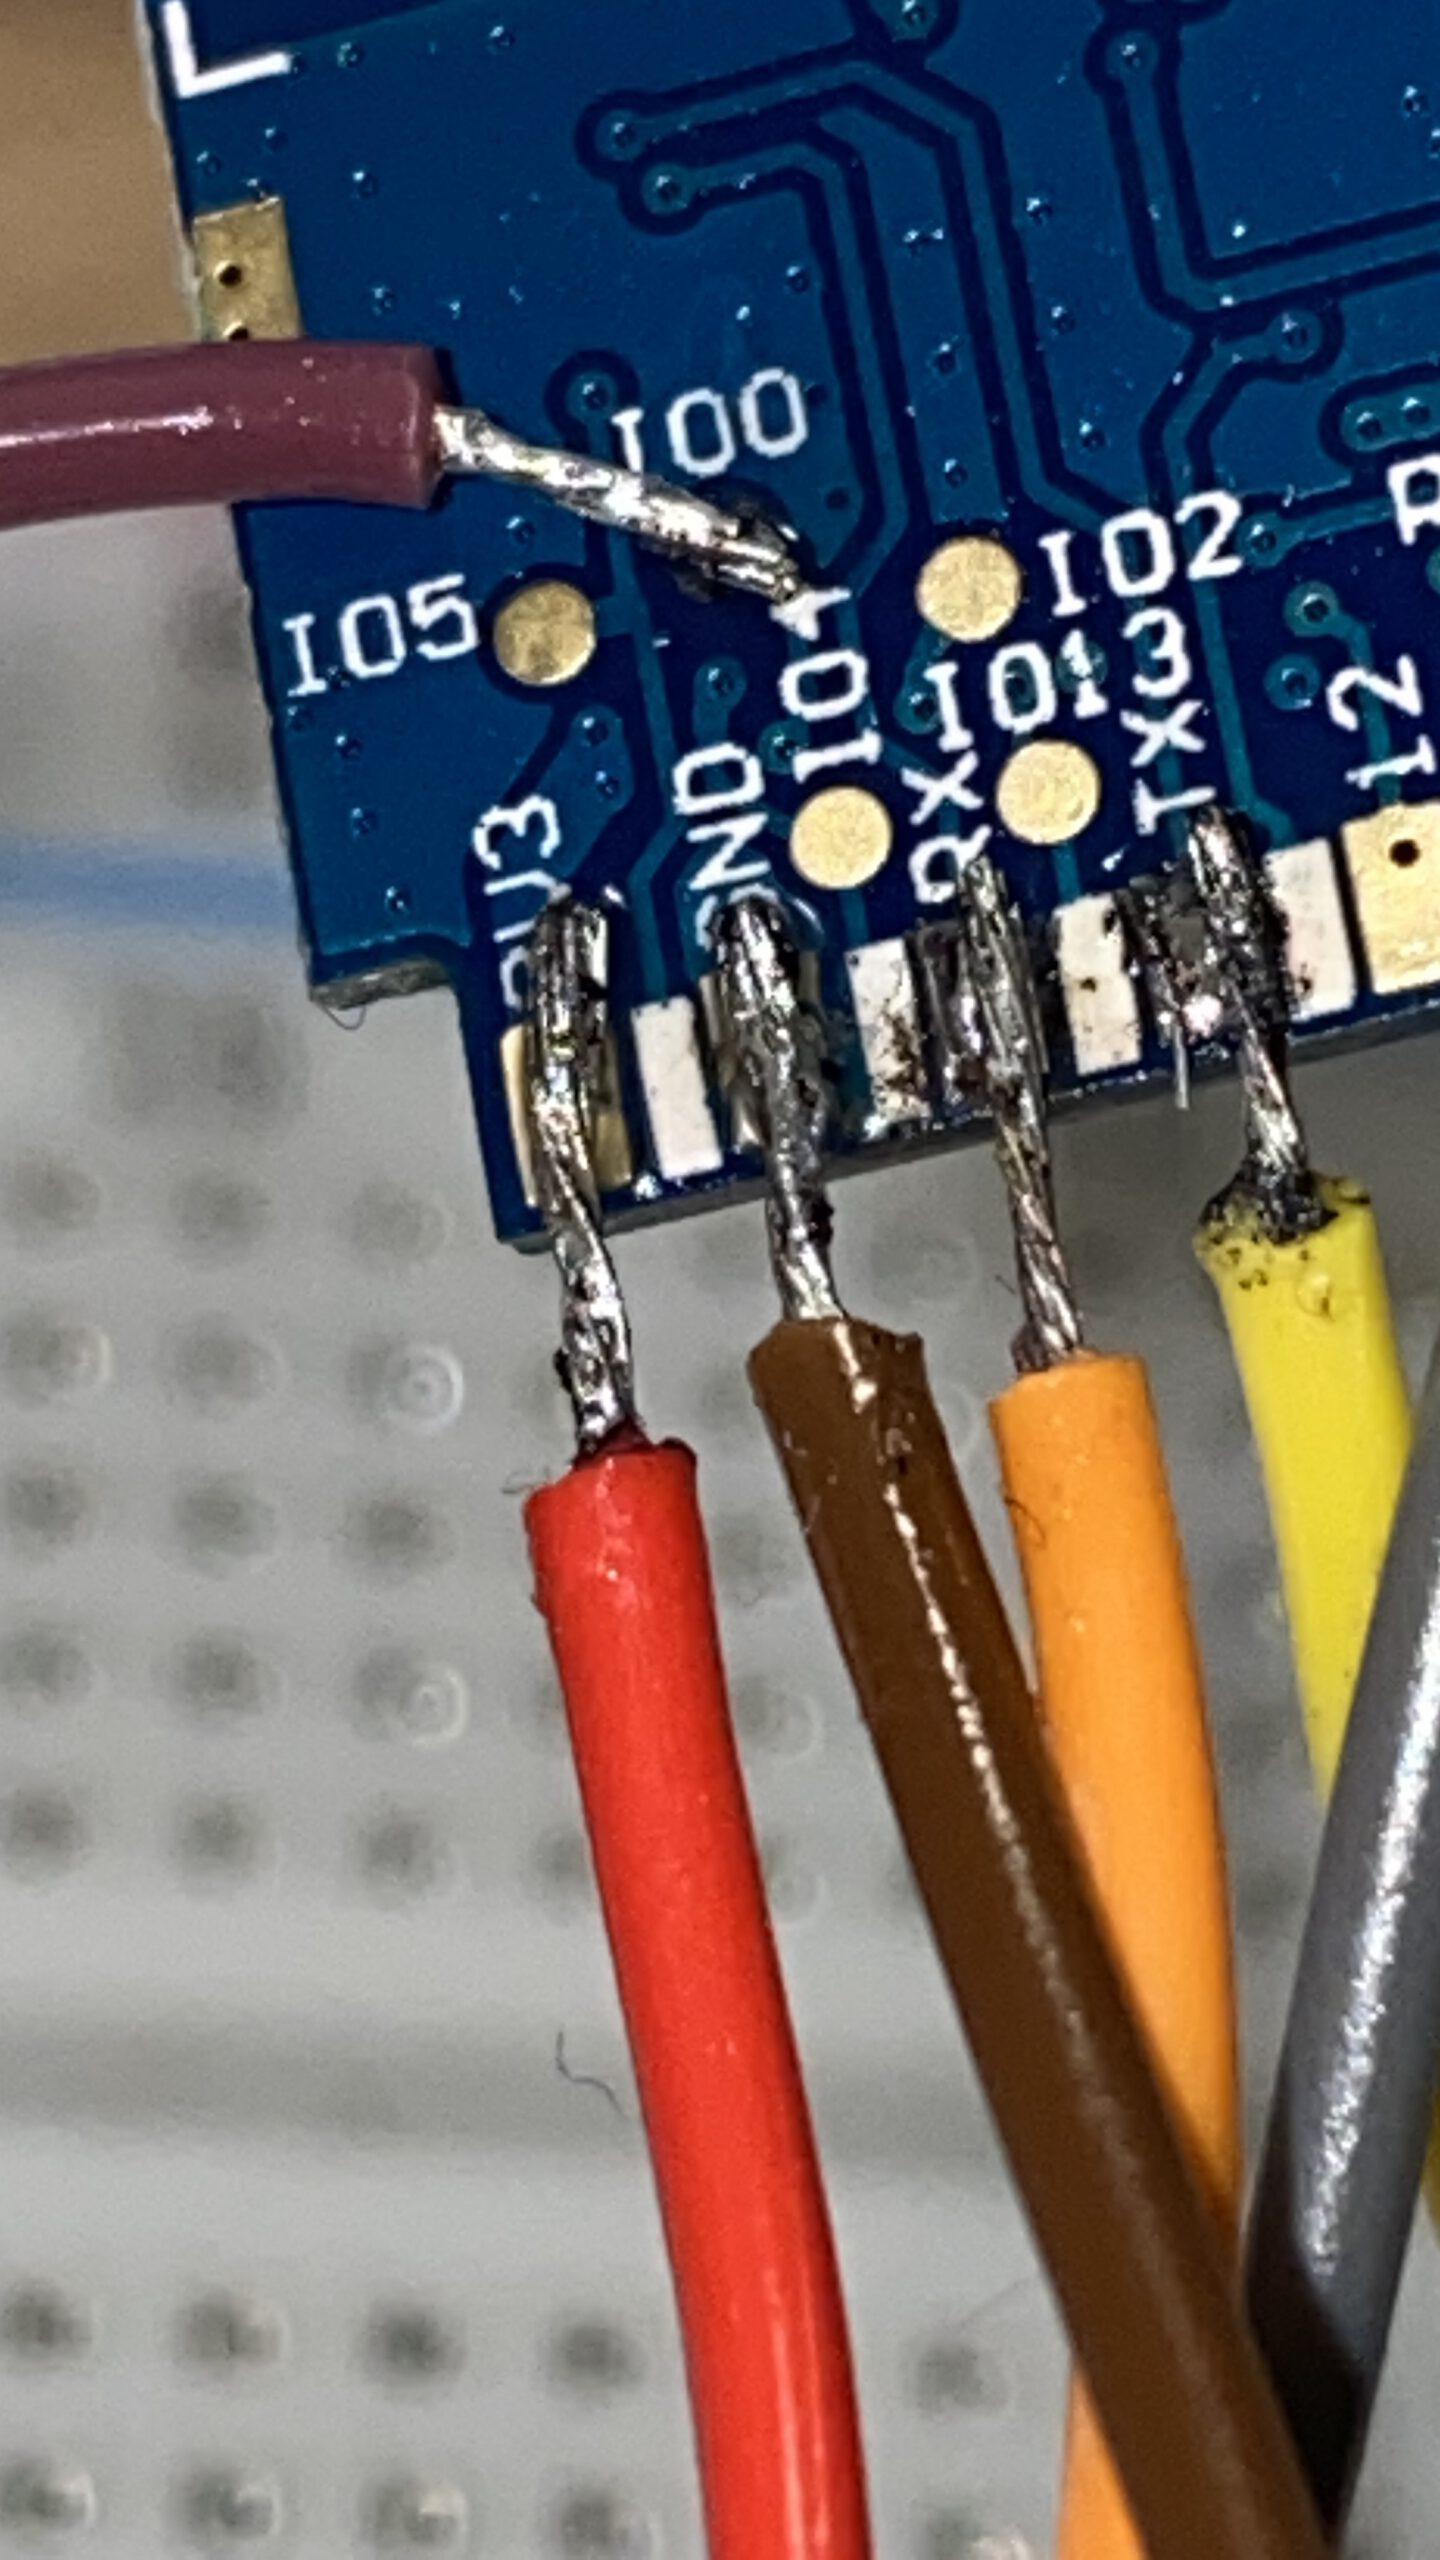
Über einen FTDI-Adapter könnt ihr den Chip flashen
Pinbelegung zum FTDI-Adapter:
Rot=VCC 3.3V
Braun=GND
Orange=TX
Gelb=RX
Lila=GND
Nun erstellt ihr euch eine BIN Datei mit dem Beispielcode (siehe unten) über ESPHome und flasht diese über den ESP-Flasher auf den Chip. LINK
Danach lötet ihr den ESP-02S ein.
esphome:
  name: lsc-plug1
  platform: ESP8266
  board: esp01_1m


wifi:
  networks:
    - ssid: "SSID"
      password: "PASSWORT"
  power_save_mode: none
  output_power: 20dB
  manual_ip:
   static_ip: 192.168.x.x
   gateway: 192.168.x.x
   subnet: 255.255.255.0

  ap:
    ssid: "lsc-plug"
    password: "12345678"

api:
logger:
ota:

binary_sensor:
  # Binary sensor for the button press
  - platform: status
    name: lsc-plug1_status
  - platform: gpio
    pin:
      number: GPIO4
      mode: INPUT_PULLUP
      inverted: true
    name: lsc-plug1_button
    internal: true
    on_press:
      - switch.toggle: relais

output:
  # Relay state led
  - platform: esp8266_pwm
    id: state_led
    pin:
      number: GPIO13


light:
  # Relay state light
  - platform: monochromatic
    id: led
    name: lsc-plug1_led
    output: state_led

switch:
  - platform: gpio
    pin: GPIO5
    id: relais
    name: LSC Relais
    restore_mode: RESTORE_DEFAULT_OFF
    on_turn_on:
      - light.turn_on: led
    on_turn_off:
      - light.turn_off: led